Monday, September 3, 2012

Craft- Conference Board

With LDS General Conference coming up I am always looking for ways to keep the kids entertained.  While looking for other things on Pintrest I ran across this idea from a site that seems to have been hijacked for a moment. I will get back to you with the site. But this woman was awesome! She had so many different ideas and one of them was creating a Conference Center. The idea behind it is the kids can find out who is speaking and place their picture at the podium. Then they can pick the topics they hear about and put it in the speech bubble.  I am seeing 


The idea behind it is the kids can find out who is speaking and place their picture at the podium. Then they can pick the topics they hear about and put it in the speech bubble.  When the speaker is finished you can put them in their seat for the remaining time period. 
 There are also places to put who is conducting the music and who is playing the organ.

This lady baby caused me a lot of grief and a ton of time but I got it finished in time for October conference. Now I just can't wait to use it.

Wednesday, August 15, 2012

Craft- Picture Quiet Books

Recently I joined Pintrest. I really didn't want to, in fact I had avoided it. But then I got called to the Relief Society Additional Activities Committee, formally known as the Enrichment Committee, formally known as the Personal, Home, and Family Enrichment Committee, formally known as the Homemaking Committee.  All of a sudden I was in charge of coming up with craft ideas for our ever popular Super Saturday craft day.  

I browsed Pintrest with no intention of joining but pretty soon I realized that I needed to take the plunge, if only to keep straight the craft ideas I was coming up with for our Relief Society event.  I had also been thinking of creating a quiet book for Matty so this helped too. While I was looking around I realized two things: 1-Matty is still six months away from using quiet books 2- I was at least a year away of having the talent to make a quiet book. 

Then I stumbled across the picture quiet book. Perfect not for Matty but to keep James entertained. The premise was simple. Simply Fresh Designs had already created the templates I just had to add pictures. Perfect. They had books on beliefs, Old Testament stories, Teaching of Jesus, Life of Jesus, Book of Mormon stories, Articles of Faith, Gospel ABCs, and Life of Prophets and Apostles. 

I used the LDS Gospel Art book to put in the pictures with my paintshop pro. Then I sent the pictures to Walgreens and picked them up a few days later. I found some 24 photo photo books at Target and Walmart and then put them together. 


Simple and easy, my kind of project.   Now I will have to launch into the other quiet book...maybe next week.

Craft- Back to school and welcome home banners

Back to school, the time of year most kids dread and most moms look forward to with gleeful anticipation. As I child I loved going back to school, I loved pouring over back to school ads and deciding what school supplies I wanted buy, what Trapper Keeper was going to go best with my new folders and pencils.  I would drag my parents to five or six different stores to make sure I got the best deals my babysitting money could buy.   Yeah, I was unlike most kids. 

My kids however cringe whenever I mention how many days are left till the school bell rings. They are even now holing up in the rooms hoping beyond hope that August 27th will never come. 

Recently I was reading the Disney Family Fun magazine and I ran across a craft that was so simple and easy that even I could do, and would solve the kids back to school blues. 

The idea was simple enough. Celebrate summer's end by picking a few activities that we hadn't done yet and pack them into the last few weeks. I just had to make a banner.

Now I like to be crafty, but I am not very good at it. So this was a low key craft for me. 

I made a template first off to have something for my banner.

 And then I got my letters and paper ready
 Look how nice all this looks, really I should be barred from Hobby Lobby, I am just grateful the closest one is about a half hour away.

After the letters were put on I went and got them laminated.  


I had to think about this one for a minute. How do I keep the fun activities on...turns out all those envelopes that I had lying around finally came into good use.


Then I strung and hung the banner. It looked pretty good if I do say so myself.


It worked so well I made a Welcome Home banner too to celebrate the kids arrival from their super long trip.  


This turned out to be one the best crafts  I had ever done and one that I am thinking of repeating for several other holidays.


Tuesday, July 24, 2012

Recipes: Presidential cookies

Because I am one of those old boring moms I read old boring magazines while I work out. My new favorite is Family Circle. Remember old and boring. So anyway I ran across the presidential cookie recipes and decided we would have a family taste test and help determine the election (the magazine claims that the bake-off has determined every election since it's start in 1992 except one).

So I put on my apron and decided that we would dive into the the world of cookie politics.

The first recipe I made was the Michelle Obama cookie called- Mama Kaye's White and Dark Chocolate Chip Cookies, named after the Obama girl's godmother. 


*full disclosure, we did not put the walnuts in the recipe as I do not believe in nuts in cookies unless they are macadamia nuts.

Now here are things that I liked about this recipe:
1- It made 8 dozen cookies. When I mentioned to a friend that one of recipes made 8 dozen cookies they were sure that was the Ann Romney "Mormon" recipe. 
2- It has mint chips which gives the cookies a nice mint after taste. 
3- They are the most buttery and melty "ist" cookie I have ever eaten. 
4- My brother did not believe that these were the Obama cookies because they were not healthy. 

That same day I made Ann Romney's cookie called simply-M&M's cookies. 


Things I liked about this recipe:
1- This is a good hearty cookie. In fact Christian broke it up and ate it in a bowl with milk the next morning for breakfast. 
2- Double dose of chocolate and then added peanut butter
3-There is no flour, not that I am anti-flour I just thought it was cool. 


So yeah they were super awesome. Now to read how the "election turned out head on over to our family blog to read the results. 

Oh and here are the recipes:

The Obama Cookie
Ingredients
  • 2 1/4 cups all-purpose flour
  • 1 teaspoon baking soda
  • 1 teaspoon salt
  • 1 cup (2 sticks) unsalted butter, softened
  • 1 stick Crisco butter-flavored solid vegetable shortening
  • 3/4 cup granulated sugar
  • 3/4 cup packed brown sugar
  • 1 teaspoon vanilla extract
  • 2 eggs
  • 1 cup each white chocolate chips, milk chocolate chips and mint chocolate chips (or Andes mint pieces)
  • 2 cups chopped walnuts

Directions

1. Heat oven to 375 degrees F. In a small bowl, whisk together flour, baking soda and salt. In a large bowl with an electric mixer, cream butter, vegetable shortening, granulated sugar, brown sugar and vanilla extract.
2. Add eggs, 1 at a time, beating well after each addition. On low speed, beat in flour mixture. By hand, stir in white and milk chocolate chips, mint chips and walnuts.
3. Drop rounded tablespoons of dough onto ungreased baking sheets. Bake at 375 degrees F for 10 to 12 minutes or until golden brown. Cool on baking sheets for 5 minutes; remove to wire racks to cool completely.


The Romney Cookie
Ingredients
  • 1 cup granulated sugar
  • 1 cup packed light brown sugar
  • 1/2 cup (1 stick) unsalted butter, softened
  • 1 1/2 cups crunchy peanut butter
  • 1 tablespoon light corn syrup (such as Karo)
  • 3 eggs
  • 1/2 teaspoon vanilla extract
  • 4 1/2 cups old-fashioned rolled oats
  • 2 teaspoons baking soda
  • 6 ounces chocolate chips
  • 2/3 cup M&M's candies

Directions

1. Heat oven to 325 degrees F. In a large bowl, cream sugars, butter, peanut butter and corn syrup on high speed until well combined. Beat in eggs 1 at a time. Beat in vanilla extract.
2. In a separate bowl, mix together oats and baking soda. Stir into peanut butter mixture until combined. Mix in chocolate chips and M&M's.
3. Using a standard-size ice cream scoop, drop dough onto baking sheets (about 9 per sheet). Bake at 325 degrees F for 18 minutes or until lightly browned. Cool 2 minutes, then transfer cookies to a wire rack to cool completely.

Tuesday, July 10, 2012

Apricot Jam part 1- Epic Failure

My friend Mandy once told me that she didn't read so called Mommy blogs because they just turned into a "look how great I am" and "my house and family look like they climbed out of a Pottery Barn catalog."  Well I will be the  first to say that I am great and my house and kids are no where near a Pottery Barn catalog, in fact I took my kids to the doctor today and discovered everyone of them had mud on their legs. So here it is Mandy, a post you would never see on a mommy blog. A blog of epic failure.

I love canning. I find it fun and in an odd way rather relaxing. There is one thing that has always eluded me though- jam. I tried to make peach jam a couple of years ago, and it didn't go so well. I didn't  attempt again. This year though I was going to try. So when we were at the farmer's market on Saturday and we got a great deal on apricots I decided that it was time.  So I came home with 29 pounds of fruit and started my research. Here is the problem, no one tells you how to can in bulk. 

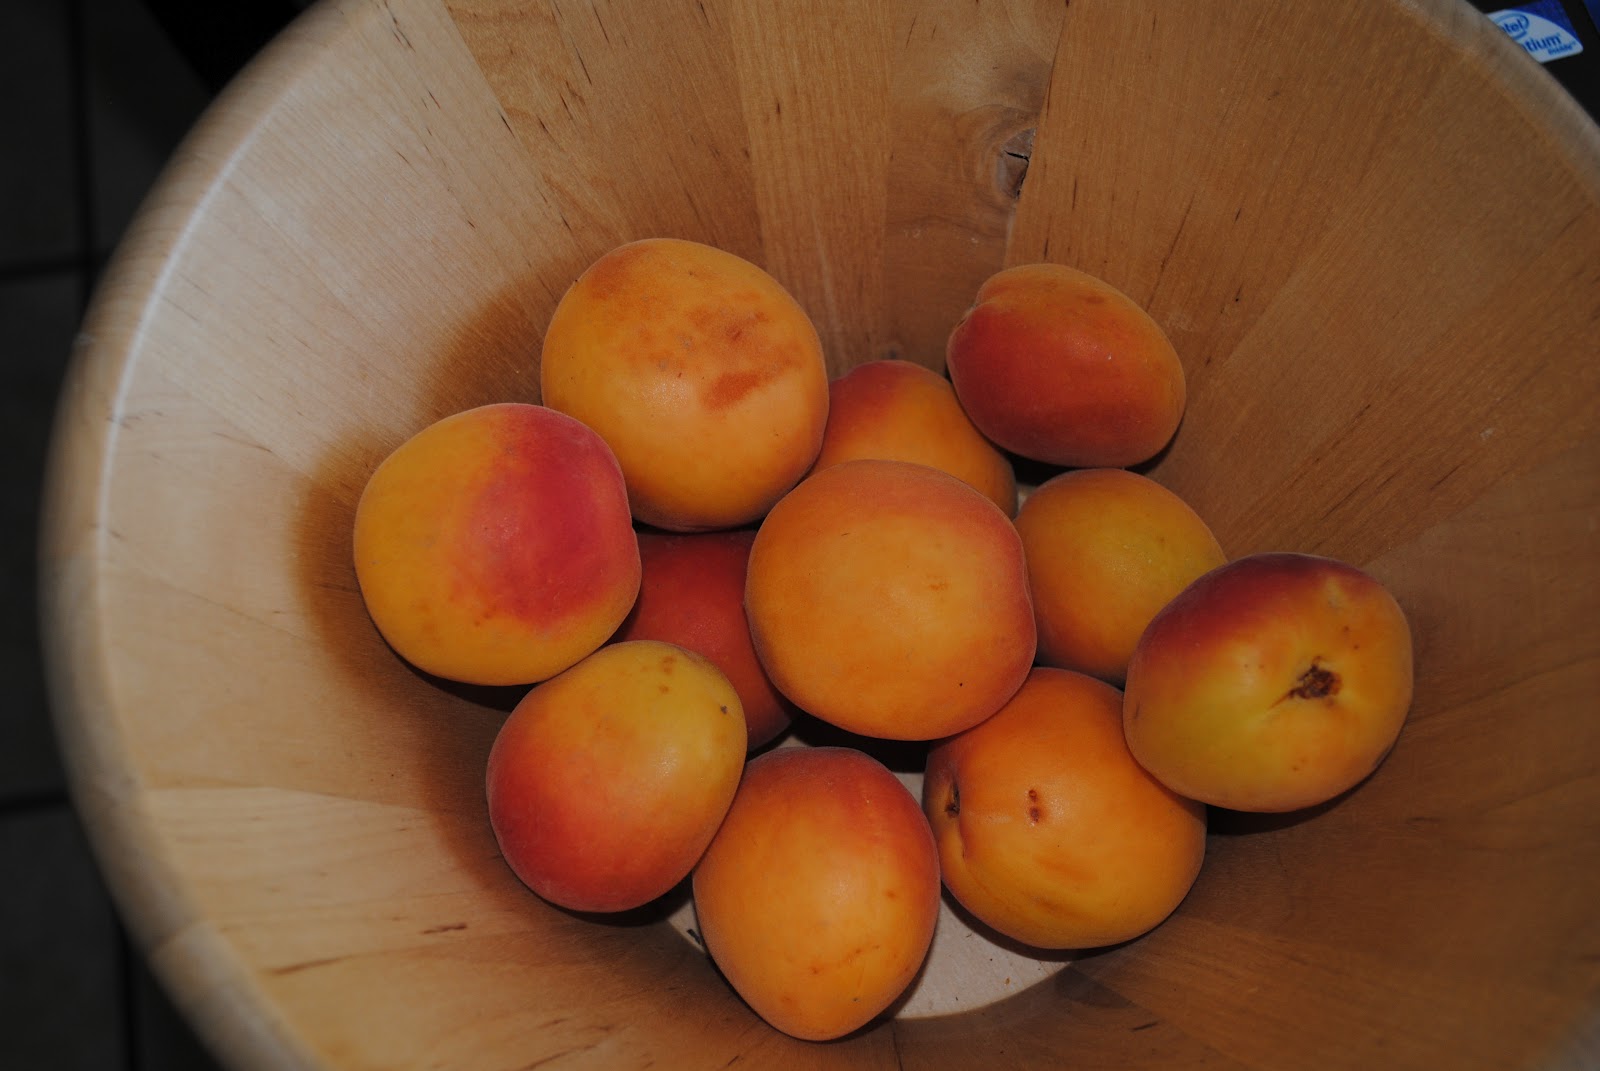
So we started with the delicious fresh apricots...

And then we mashed the fruit.  And yes that is a a box of jell-o, my cute neighbor swears by it in her jam.


Since we were using the pectin recipe we started cooking down the fruit. 


And when that reached a boil we added 20 cups, yes 20 cups of sugar!


And let it cook some more.

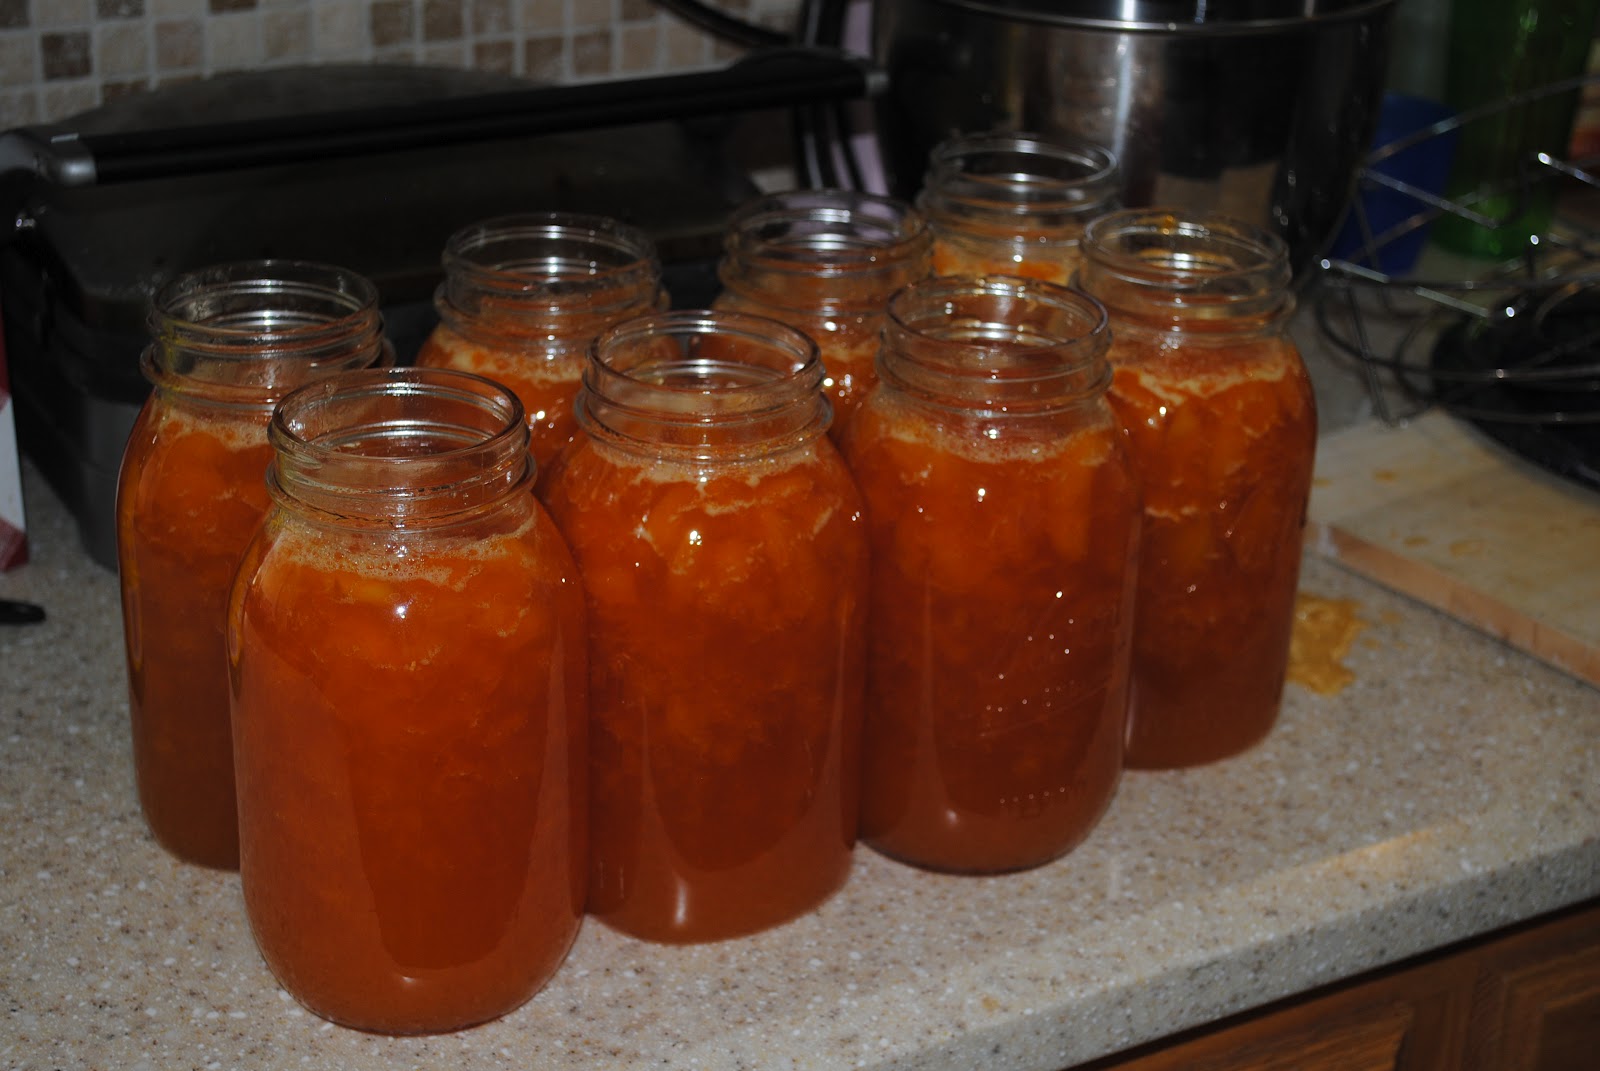
We followed the recipe and took it off the stove once again it boiled and so we pulled it off and put it in the jars.


Yeah, there is no jam. We have eight quarts of syrup.

There are a few things I can still try and I will attempt them in the next few days, but until then who wants pancakes?

Thursday, June 7, 2012

Recipe- Snikerdoodle Cupcakes

So I am one that has to watch tv or read a magazine while I am working out, I just don't enjoy working out enough to just do simply work out. So last week I was thumbing through the June addition of Family Circle and I came across a recipe for snikerdoodle cupcakes. Now I like snikerdoodles and I like cupcakes so this seemed like a good idea. And as luck would have it we were having my parents over for Sunday dinner so I had a good excuse to make these babies. First I have to say it was a simple recipe-

1 box of white cake mix
1 cup of milk
1 stick melted butter
3 large eggs
1 tsp vanilla extract
2 tsps cinnamon

Heat the oven to 350 and line 2 cupcake pans.   In a large mixing bowl combine all ingredients and mix on low for a minute. Scrap sides then mix again for two minutes on a higher speed.

Then here is my newly discovered tip- scoop the batter out of the bowl with an ICE CREAM SCOOP. Now I am probably late to the party on that tip but wow! It made the most perfect sized cupcakes and very little mess.

Bake the cupcakes for 15-20 our until they spring back when pressed.

Remove and then cool.

Matty and I sampled one at this stage and I have to admit though the batter did not taste like snikerdoodles the baked cupcakes did.

Then came the time to make frosting.

I made a simple butter cream frosting-

3 3/4 cup of powdered sugar
1 stick of softened butter
3 TBSP milk
1 tsp vanilla

then I added 3 tsps of ground cinnamon.  

When Matty sampled that cupcake there was a "mmmm" sound that left his mouth and the kids each ate three.

These cupcakes were super moist and just perfect. I know we will be making them again soon.

Friday, June 1, 2012

Recipe- Waffle Tacos


Yesterday I was going through my latest issue of Family Circle when I came across the idea to use savory waffles as dinner. I was intrigued by the idea for Waffle Tacos. The picture made them look delicious and I was all set to try them. I went to the link to get the recipe only to find that  all the other waffle dinners had recipes but the waffle taco was missing. I still had the desire for the waffle tacos so I came up with my own recipe.

Now I am sure that you are thinking the same thing James was when I mentioned it, "um, no." But he was final products biggest fan.  The girls also snarfed them down. It ended up being a hit.

So here is the recipe for our new family favorite- Waffle tacos.

Recipe-


Waffle mix
2 teaspoons of chicken bullion
1 can of green chilies


Prepare waffle mix as directed on bag. Then add the 2 teaspoons of crushed chicken bullion and the can of green chilies. Cook as directed.

Top with your favorite taco toppings. We used refried beans, chicken, tomatoes, cheese, olives, salsa, and sour cream.  But you can use onions, peppers, beef, black beans, lettuce, what ever you want.

The waffles were fabulous and even better with the fun toppings.